5月27日 企画案
今回、私たちの班では、紫外線が肌や健康に与える影響をリアルタイムで把握し、 安全対策を講じるため、UV指数を簡単に確認できるスマホアプリを作ろうと考えています。
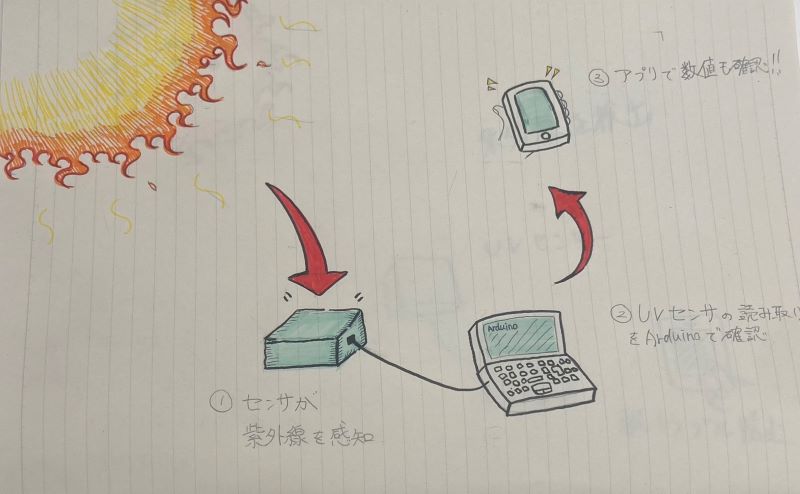
現状考えている案は、UVセンサーのデータをWi-Fi経由で送信し、アプリでそのデータをリアルタイムに表示することができます。 これにより、UV指数を簡単に確認することが可能となります
今回、私たちの班では、紫外線が肌や健康に与える影響をリアルタイムで把握し、 安全対策を講じるため、UV指数を簡単に確認できるスマホアプリを作ろうと考えています。
現状考えている案は、UVセンサーのデータをWi-Fi経由で送信し、アプリでそのデータをリアルタイムに表示することができます。 これにより、UV指数を簡単に確認することが可能となります
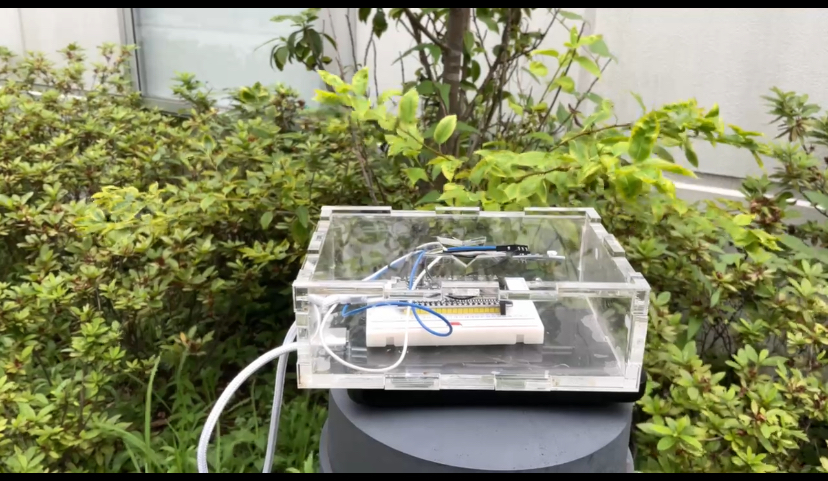
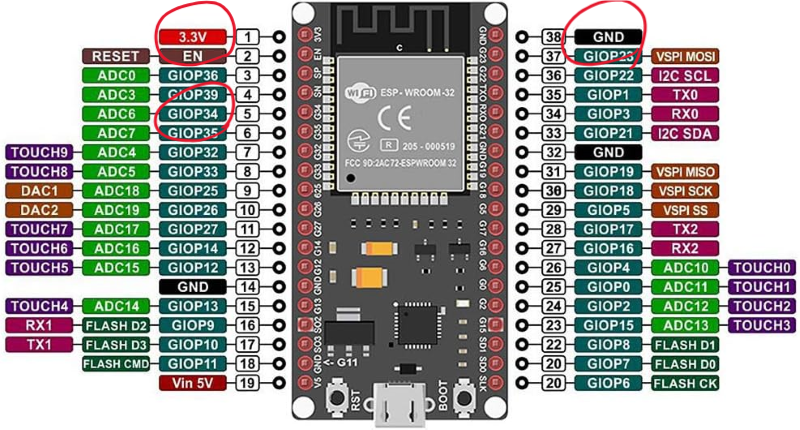
今回はUVセンサーが届いたので、早速接続しようと思う。
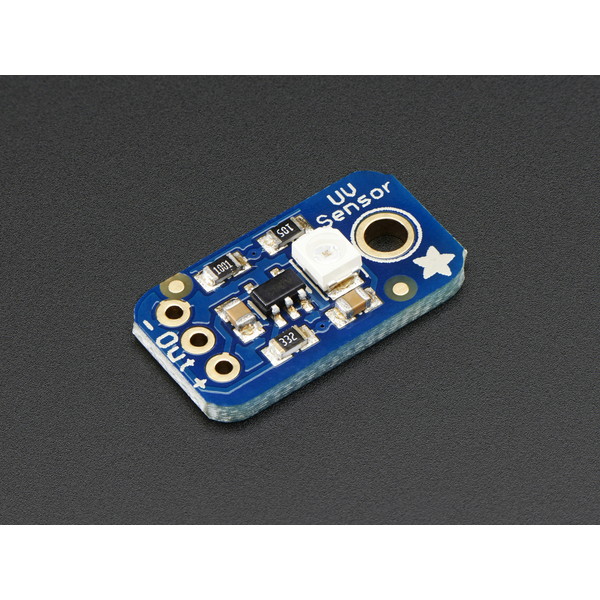


        int sensorPin = A0; // UVセンサーが接続されているアナログピン
        float calibrationFactor = 307.0; // キャリブレーション係数(センサーの特性に基づく)

        void setup() {
          Serial.begin(115200); // シリアル通信の初期化
        }

        void loop() {
          int sensorValue = analogRead(sensorPin); // センサー値の読み取り
          float voltage = sensorValue * (3.3 / 4095.0); // センサー値を電圧に変換(ESP32のADCリファレンス電圧が3.3Vの場合)
          float uvIntensity = voltage * calibrationFactor; // 電圧をUV強度に変換
          float uvIndex = uvIntensity * 0.1; // UV強度をUVインデックスに変換

          Serial.print("Voltage: ");
          Serial.print(voltage);
          Serial.print(" V, UV Intensity: ");
          Serial.print(uvIntensity);
          Serial.print(" mW/cm^2, UV Index: ");
          Serial.println(uvIndex);

          delay(1000); // 1秒待機
        }
            #include
                #include

                const char* ssid     = "zikkenndayo"; // 繋げたいネットワーク
                const char* password = "zikkenndayo";  // 繋げたいネットワークのパスワード
                String pkey = "XRxZkHGZ5LrD7BjxakKL";         // 端末ID

                const int uvSensorPin = 34; // UVセンサーのアナログ出力を接続したピン(ESP32のアナログピンを使用)
                // dfLinkインスタンス化 --> conn1とよぶ
                dfLink conn1(pkey);

                void setup() {
                    Serial.begin(74880); // esp32は74880
                    WiFi.begin(ssid, password);
                    Serial.println("WiFi connecting");
                    while ((!(WiFi.status() == WL_CONNECTED))){
                        delay(300);
                        Serial.print(".");
                    }
                    Serial.begin(74880); // シリアル通信を115200ボーで開始
                    delay(10);
                    Serial.println("");
                    Serial.println("WiFi connected");
                    // Serial.println("IP address: ");
                }

                void loop() {
                    int sensorValue = analogRead(uvSensorPin);
                    Serial.println(sensorValue);

                        int idata = sensorValue;
                        float fdata = 0.0;
                        String tdata = "";
                        String ret = conn1.send_data(String(idata), String(fdata), tdata);

                        Serial.println(ret);
                     }
                    delay(1000);

if (sensorValue != 0) { // センサー値が0でない場合にのみデータを送信}このコードを追加した